Everyone can contribute! Learn DevOps and Cloud Native in our cafe ☕
Technology is moving fast in the DevOps and Cloud Native community.
Join the conversation and add your thoughts, tips, experiences, stories.
"Everyone Can Contribute" is inspired by GitLab's mission.
GitLab Pages with Hugo: Add Google Analytics
Google Analytics is a powerful way to analyse your website usage and unveil bugs and unexpected behaviour. Most often you just want to know how often a specific page is viewed and get some generic metrics.
Setting up your website with GitLab Pages and Hugo is a breeze. Navigate to GitLab.com > New Project > From Template, search for Hugo and get started after the first deployment.
After familiarizing with the structure and creating your first blog post, you can dive into more customizations such as adding Google Analytics. This requires the following:
- Google Analytics Account and/or Tracking ID
- Commit & publish permissions for your GitLab project
Get a Google Analytics Tracking ID
Navigate into your Google Analytics dashboard and pick the Admin button at the bottom left. In the centered colum, click to add a new property with + Create Property.
Important: Choose
Web - Measure your websiteto obtain a GA Tracking ID.Apps and webgenerates a measurement ID which is incompatible.
Fill in the website details, save and copy the Tracking Id.
Instead of using the proposed Javascript snippet from Google Analytics, Hugo provides a native integration.
Add the Tracking ID to Hugo
Open the Web IDE and navigate to the config.toml in your GitLab pages project. Add a new main key called googleAnalytics and paste the tracking ID obtained from Google Analytics.
baseURL = "https://everyonecancontribute.cafe/"
languageCode = "en-us"
title = "#EveryoneCanContribute"
theme = "everyonecancontribute"

googleAnalytics = "UA-123456789-1"
Include the Header Template
Depending on the layout, you may need to navigate into your theme directory tree inside the Web IDE. everyonecancontribute.cafe uses a theme path at themes/everyonecancontribute/layouts/partials. The file to target is header.html or html-header.html.
The easiest way to find the first included header file is to open the index.html and check the first include:
{{ partial "html-header.html" . }}
<!-- <body data-spy="scroll" data-target="#navbar" data-offset="72" class="position-relative"> -->
<body data-target="#navbar" data-offset="72" class="position-relative">

    {{ partial "theme-header.html" . }}
In our case, we open html-header.html and add the template for Google Analytics.
<!DOCTYPE html>
<html>

<head>
    <title>{{ .Site.Title }}</title>
    <meta name="viewport" content="width=device-width, initial-scale=1">
    <!-- ... -->
    <link rel="stylesheet" href="https://cdnjs.cloudflare.com/ajax/libs/font-awesome/5.13.0/css/all.min.css">

    <!-- Google Analytics -->
    {{ template "_internal/google_analytics.html" . }}

    <!-- Twitter card -->
    {{ partial "social-cards" . }}

</head>
Merge Request and Tests
Commit both changes inside the Web IDE into a new branch and create a merge request.
Prior to merging, you can pull the Git branch into your local development environment and check whether Google sees the user.
Navigate into the real time dashboard in Google Analytics.
Open a new terminal and start a local Hugo instance.
git fetch
git checkout <mr-branch-name>

hugo server -D
Open http://localhost:1313/ in your browser and check the increased count in Google Analytics.
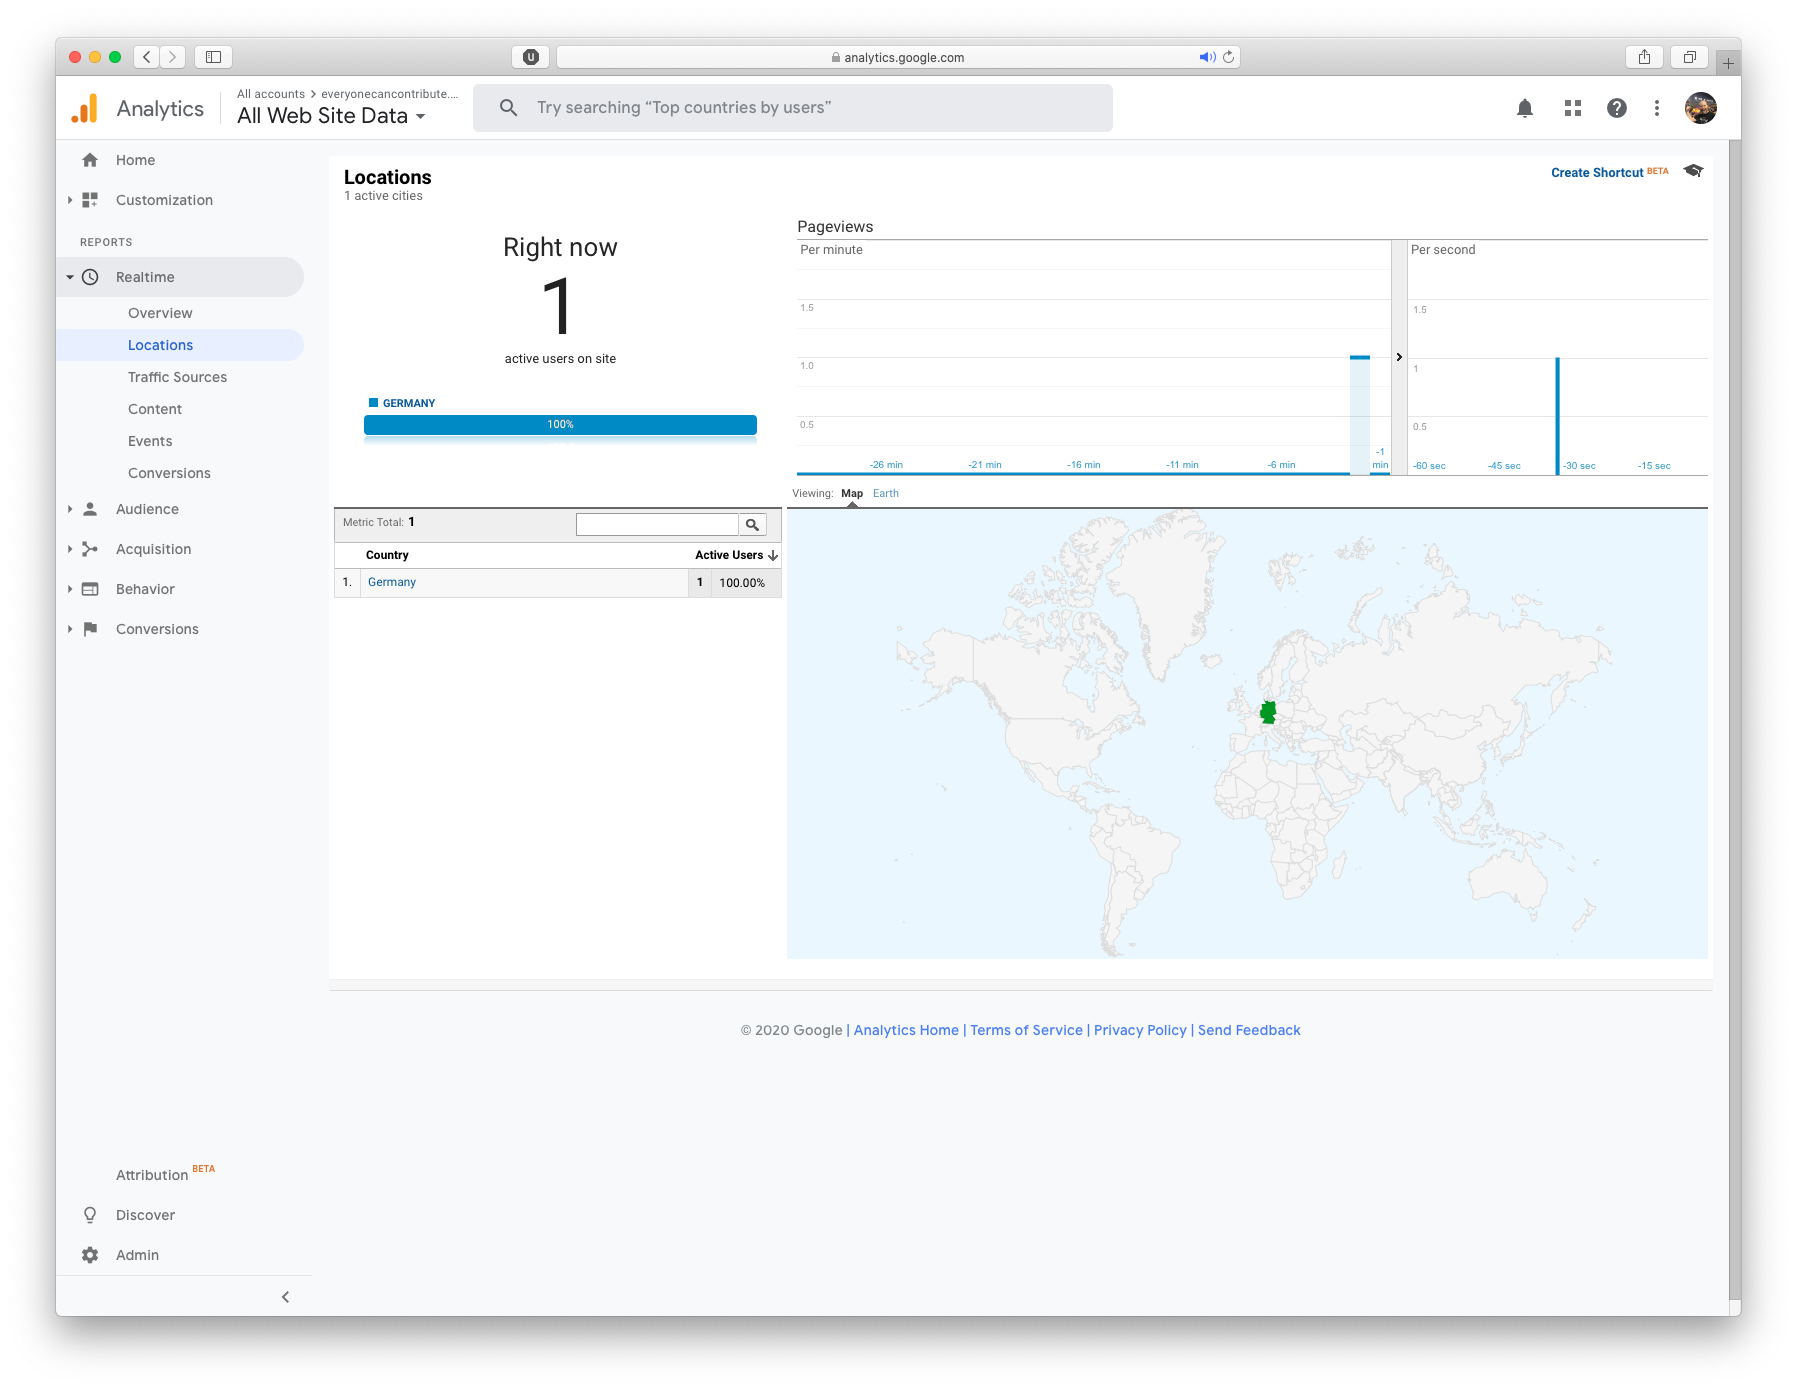
If the number stays 0, make sure to verify that the Tracking ID is correct. You can inspect the code in the browser dev console sources for example.
Merge and Publish
everyonecancontribute.cafe uses the “MR review, merge and tag a release” workflow - use your preferred way to merge and publish the changes to GitLab pages.
For more inspiration, checkout our GitLab repository - #everyonecancontribute, it is Open Source! :)